How to edit a Solution page
- Go to the solution landing page that you wish to edit
- Click the Edit button at the top of the page
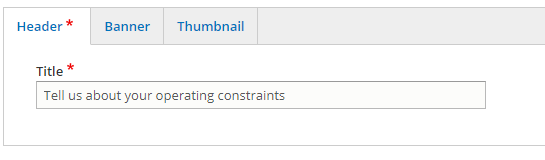
- In the Header tab, you can change the title of the solution
- Click the Banner tab to change the header image for this page
- You can do this by clicking Remove next to the banner image that is already there, and then by clicking Choose file to select your new image
- Click the Thumbnail tab to change the image that appears on the homepage for that particular solution
- You can do this by clicking Remove next to the banner image that is already there, and then by clicking Choose file to select your new image
- To edit the teaser text that appears on the homepage, scroll down to the Body section, and click Edit summary
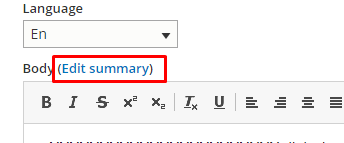
- Then add your text into the field that appears
- Note, if this field is left blank it will automatically pull a snippet of text from the Body section
- To change the text that appears above the form, you can use the Body field
- When you are finished with your changes, scroll to the bottom of the page and click Save
How to: Website
Contents
How to publish/unpublish a product page
Editing Menu links (top, side, bottom)
How to rearrange order of the menu links
How to add a home slider/blog/case study/basic page (NOT product page)
How to edit a home slider/blog/case study/basic page
How to add a discount code (after adding a promotion)
Adding a Course (e.g. Foundation Course)
Logins
|
Tool |
Website |
Login |
PW |
What its used for |
|
Website back end |
Go to website, click on the person icon, and log in to the client portal with these details |
admin2022 winter2022 |
Making edits to the live website |
|
|
Staging website back end |
|
winter2022 winter2022 |
Practicing edits to the website on a staging site (so you can get it right before updating the real website) |
Notes
- “Configure block” is not something we can edit (minimal knowledge on what this actually does)
- There are parts of the website we CAN’T edit, and may need Koda’s help
- Tabs such as “Structure”, “Groups”, “People”, and “Statistics” are not relevant to editing the website (as far as I am aware – minimal knowledge on these tabs)
- Contact John Adewale, Project Manager at Koda at john@kodatechnology.com if you are stuck or unsure on what to do (if unsure, best to contact John rather than solving yourself)
- Koda’s charges are $120 per hour
- If work needs to be done on the website (i.e. coding efforts), contact John and only get him to work on a task if we send him a Purchase Order (approval by Craig & John)
- Website and the LMS are two separate platforms, this guide is for website use only
Product Pages
How to add a product page
- Go to “Commerce” at the top
- Select “Products”
- Click on “Add Product”
- Click on “Default”
- Click save once you enter all the necessary information
How to publish/unpublish a product page
- Go to “Commerce” at the top
- Select “Products”
- Click on “Edit” for the product page you want to publish/unpublish
- Click on “Published” (a blue box means it will be published) OR click on “Published” to unpublish (no blue box means it won’t be published)
- Click Save
Editing Menu links (top, side, bottom)
How to add a menu link
- Hover over the pencil icon
- Click “Edit menu”
- Click on “Add link”
- Enter the URL link of the website page you want it to link to
- Enter the menu title under “Menu link title”
- Click Save
How to remove a menu link
- Hover over the pencil icon
- Click “Edit menu”
- Click the blue box under “Enabled” for the page you want to remove from the top menu (blue box means enabled, no blue box means disabled)
How to rearrange order of the menu links
- Hover over the pencil icon
- Click “Edit menu”
- Drag the icon to rearrange from top to bottom
- Click Save
How to add a home slider/blog/case study/basic page (NOT product page)
- Hover over “Content” at the top
- Click on “Add content”
- Click on “Home Slider”, “Blog”, “Basic page”, or “Case Studies”
- Enter all the necessary information
- Click Save
How to edit a home slider/blog/case study/basic page
- Click on “Content” at the top
- Click “Edit” on the page you want
- Click Save
Discount Codes
How to add a Promotion
- Hover over “Commerce” at the top
- Click on “Promotions”
- Click “Add promotion”
- Enter “Name” and select “offer type”
- The name of the promotion is NOT the name of the discount code
- The “offer type” we are currently using for Azimuth’s Foundation Course is “Percentage off the order subtotal”
- All other “offer types” haven’t been tested yet
- Click on “All conditions must pass” under “conditions” once you have selected the conditions a customer must meet in order to receive the discount
- This option allows us to select the conditions a customer must meet in order to receive the discount
- i.e. if you select customer email, the customer HAS to use the customer email you have entered to get the discount code
- This hasn’t been tested as of yet
- Click “Enabled” under “Status” to enable the discount code
- Enter the start date of when you want the discount code to activate
- Click on “provide an end date” to choose a date for the discount code to expire
- Click on “Limited number of uses” or “Total per customer” under “Usage Limits” to allow the number of times the discount code can be used
- Total available: How many times a customer(s) may use the same discount code
- Total per customer: Total number of customers that can use the same discount code
- Click Save OR Save and add coupons
How to add a discount code (after adding a promotion)
- Hover over “Commerce” at the top
- Click on “Promotions”
- Click “Edit” on the promotion you want to add discount codes for
- Ensure all details are correct (i.e. start/end date, discount code percentage, total number of uses) before proceeding to the next step
- Click “Coupons”
- Click “Add coupon”
- Enter all the necessary details (i.e. coupon code name)
- Click Save
Adding a Course (e.g. Foundation Course)
- Click on “Courses” at the top
- Click on “Add Course”
How to edit Foundation Course
- Click on “Courses” at the top
- Click on “Edit”
- Select “visibility” for the course
- Private: no one can access this page (including staff members with admin access)
- Semi private: for admin staff
- Public: anyone can access course
- Please note Step 3 is based on the knowledge Baden has passed over
- Enter the price for the course